How to Draw Lines With Arrows in Illustrator
Thinking of creating arrows for your project or logo in Adobe Illustrator, but having trouble on how to actually do it? This tutorial will guide you in making your own basic vector arrows.
Follow the step-by-step tutorial below:
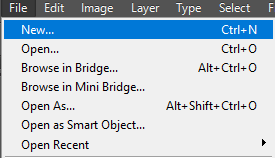
1. Start off by creating a new document using Adobe Illustrator and select "File" > "New".
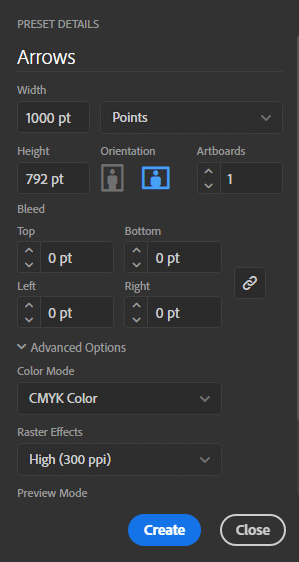
2. Supply the necessary size details and click "OK".
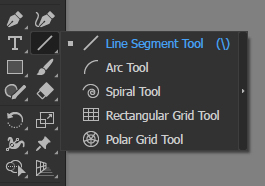
3. Then select the "Line Segment Tool".
4. Back in your document window, hold down your left mouse button as you drag the line on your canvas.

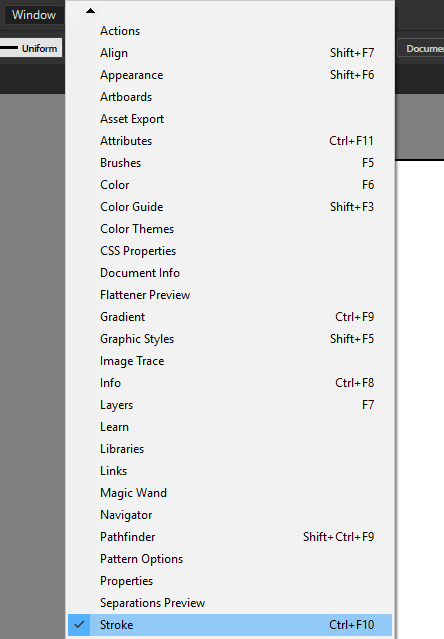
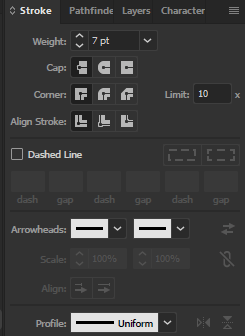
5. To add an arrowhead, click on "Window" > "Stroke".
6. In the stroke panel, click on "Arrowheads" and choose from the drop-down box the start point and end point shapes of your arrow.

7. To change the color of your arrow, click on your arrow using the Selection Tool and select the Stroke Color Tab. In this example, we are going to select "Orange".
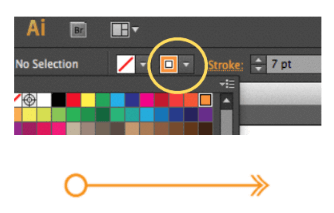
8. To change the thickness of the arrow, adjust the Stroke thickness from the weight tab in the upper toolbar or from the Stroke Panel. In this example, we will be setting the arrow thickness to 12.
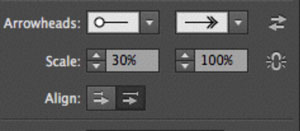
9. To change the size of the start and end points of the arrow, simply go to the Stroke Panel and adjust the scale level for both endpoints. For this example, we are setting it at 30% scale for the start point and 100% for the endpoint.

10. Repeat the steps above to create more arrows. Just rotate the angle and adjust the start point/end point according to preference.
11. If you are looking for a more complex arrow and want to curve areas of the arrow, click on "Add Anchor Point Tool".
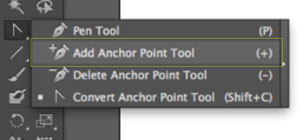
12. Click on the part of the arrow where you'd like the curve to peak.

13. Next, is to select the "Direct Selection Tool" and start clicking and moving/ dragging the selected anchor according to your preference.
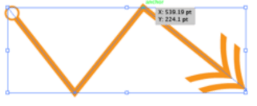
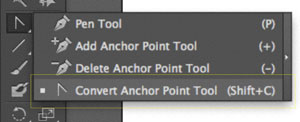
14. To smooth the bend, click on "Convert Anchor Point Tool" to start moving your converted anchor into a curved bend.

Alternative Method
1. You may also use the rectangle and polygon shapes tool to create an arrow. Start off by clicking on the "Rectangle Tool" and drag your mouse to the canvas to make a rectangle.

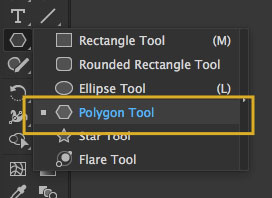
2. Now click on the "Polygon Tool" and drag the mouse to the canvas and while holding the left mouse button, press the down arrow until you see a triangle. Release your hold on the mouse and rotate the newly created Triangle.

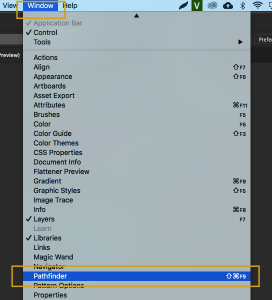
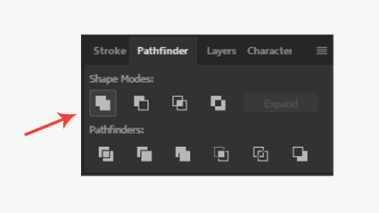
3. To join the two shapes together, select "Windows" > "Pathfinder".
4. After opening Pathfinder, make sure that the rectangle and triangle are overlapping each other.

5. Select both shapes and then in the Pathfinder panel, click on "Unite". You'll notice that the overlapped stroke paths will be removed and the shapes will be united into a single arrow.
6. Customize the arrow according to preference. You may change the stroke color or fill color and rotate it to whichever direction you'd like it to point.

How to Draw Lines With Arrows in Illustrator
Source: https://www.makiplace.com/blog/how-to-make-arrows-in-illustrator/
0 Response to "How to Draw Lines With Arrows in Illustrator"
Post a Comment